How to Setup Apple Pay on Wordpress or Woocommerce Website
Do you want to setup Apple Pay on your Wordpress or Woocommerce website to increase your sales?
Apple Pay can dramatically increase conversion rates on an e-commerce shop because it allows customers to check out quickly from their Apple devices.
Steps to Install Apple Pay
In this tutorial I teach you how to setup Apple Pay on a Wordpress or Woocommerce website.
This tutorial is designed for beginners, without any advanced website development skills.
This means, absolutely anyone can install Apple Pay on their website.
In this tutorial, we use Stripe to process & collect the payments from Apple Pay. So you will need to sign up for an account with them. This is where all your money from Apple Pay will end up.
1. Install & Signup for Stripe
Step 1 in getting Apple Pay on your website is installing Stripe on your Wordpress website.
I actually like to use an unofficial Stripe Plugin, this one is called Payment Plugins for Stripe WooCommerce.
It’s extremely well used & trusted, so I don’t hesitate recommending it.
Once you have installed this plugin & activated it, it’s time to sign up for a Stripe account (it’s free).
From there, you need to link the plugin & your Stripe account - all you have to do is sign in from the plugin.
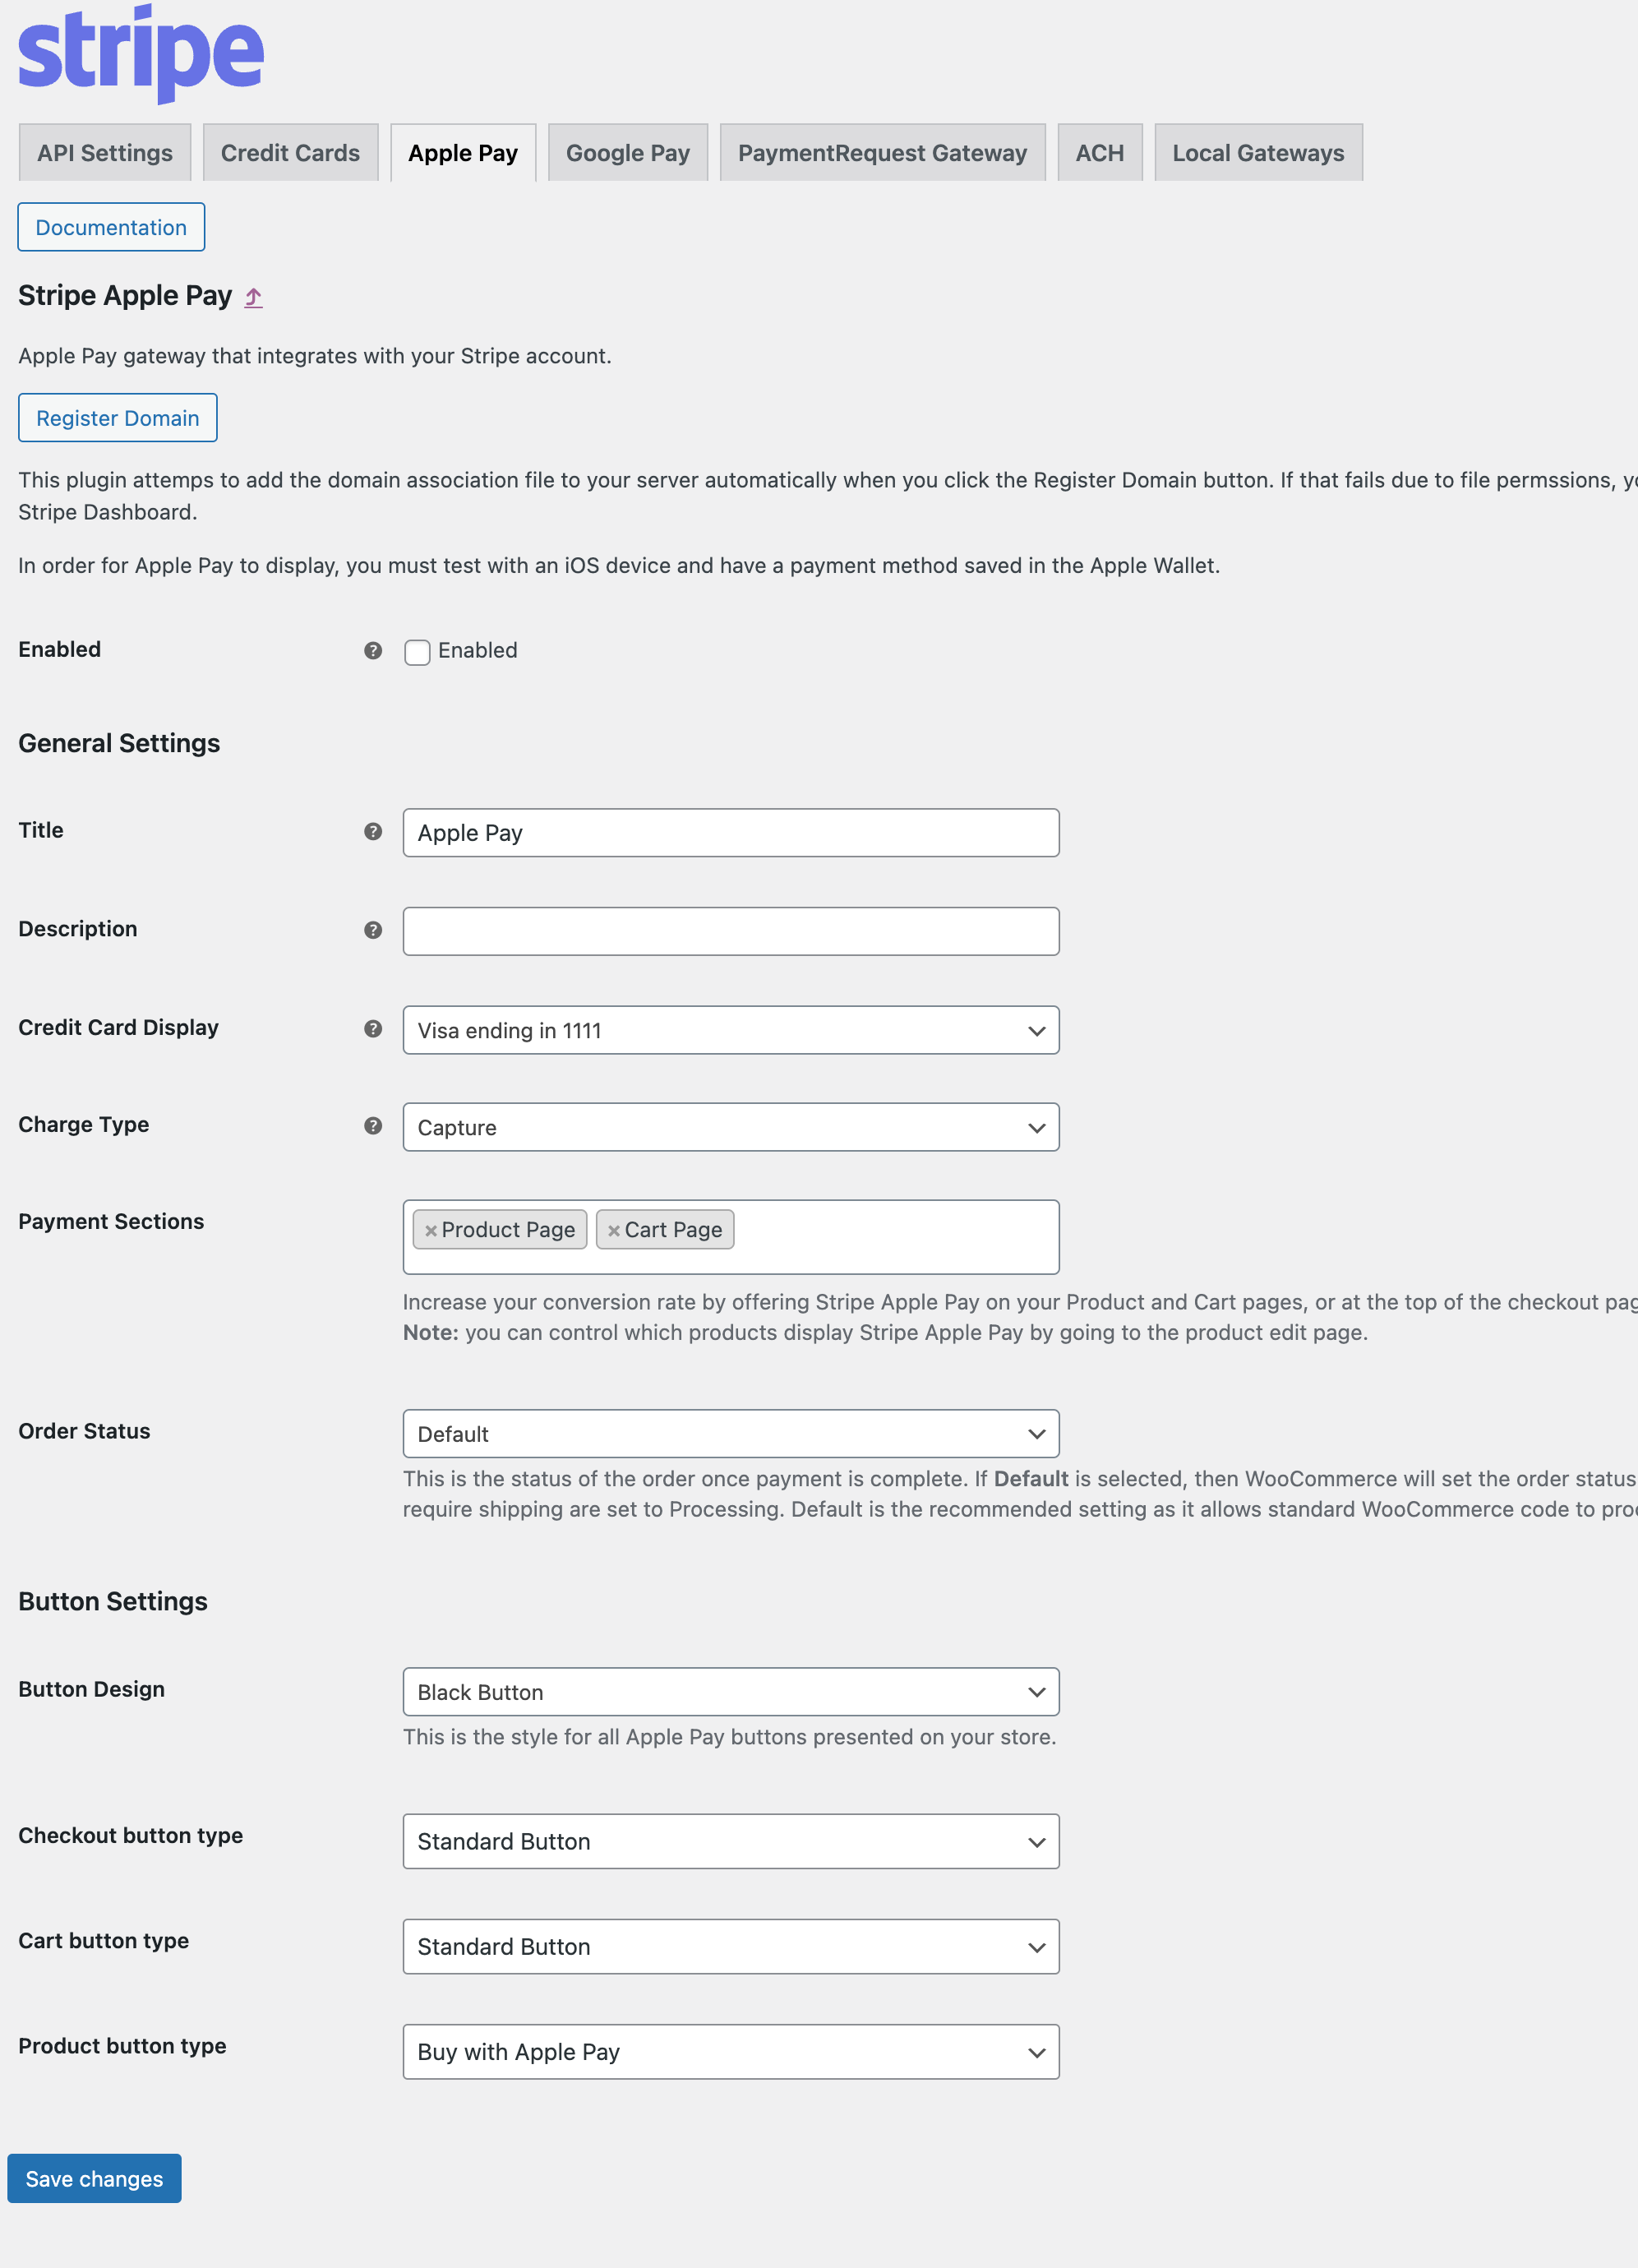
2. Configure Apple Pay on Wordpress
Now is the time for us to configure the Payment Plugins for Stripe WooCommerce plugin that we installed.
Activate Apple Pay. This can be done by simply turning on Apple Pay inside the payment settings.
Design the Apple Pay button. Once you have activated Apple Pay, you will be able to start designing how you want the button to look.
Configure Apple Pay.
3. Your Set to Go Live with Apple Pay!
Now this is a fairly easy tutorial, that shouldn’t take too long.
Overall this will increase the value of your website massively.
Apple Pay Summary
Installing Apple Pay on your eCommerce website is a great gateway to install.
I highly recommend you take the time to install Apple Pay on your Wordpress or Woocommerce website.


